Open documentation index
This filters titles already loaded on this page. It does not search article text or external sites.
No title on this page matches.
DOCS / TASK GUIDES
Start with your first Creation-SSH host
Documentation and tutorials now share one task-oriented home. Complete one real workflow and use its expected result to verify the path.
BEFORE YOU START
Confirm the host identity and connection mode
Agent mode provides the full integrated workflow; SSH mode provides native connection capabilities. Verify the host key on first connect and stop on unexpected changes.
01 / QUICK START
Before you connect
Open the installed client and confirm the connection mode, host identity, and data boundary.
Choose Agent or SSH mode
Use Agent mode for persistent terminals, monitoring, and structured operations. Choose SSH mode when you only need a native connection or the target should not run the agent.
Verify the host identity
Verify the host-key fingerprint on first connect. If a known host key changes unexpectedly, stop instead of accepting it silently.
Confirm the Cloud data boundary
The SSH data plane always connects directly from the client to the server. Creation Cloud stores accounts, devices, and allowed sync data only; it never proxies terminals or remote commands.
02–07 / TASK GUIDES
Hands-on guides
Add your first host
Save an authenticatable Linux host and establish first-use host-key trust.
Steps
- Step 1
Open Hosts
Open host management, choose Add host, and give the server a recognizable name.
- Step 2
Enter SSH details
Enter the SSH target, port, and login user. Treat any display address as separate from the SSH target.
- Step 3
Save and connect
Save the host and enter the password when prompted. It is used for authentication and encrypted local storage, not sent to Creation Cloud.
- Step 4
Review the host key
Read the fingerprint before trusting it. Cancel and investigate if it differs from the value supplied by the administrator.
- Step 5
Confirm the host record
Return to the host list and confirm the name, SSH target, and observed connection result before deploying the agent.
Deploy or repair the agent
Let the client detect server architecture, upload only the matching agent and static tmux pair, and complete the protocol handshake.
Steps
- Step 1
Open maintenance
Open the target host menu and choose Install agent or Update / repair agent.
- Step 2
Start architecture detection
After confirmation, the client runs a read-only uname -m over authenticated SSH. Do not select an architecture manually.
- Step 3
Watch deployment progress
Wait for the matching agent and tmux upload, length and integrity validation, atomic installation, and service readiness.
- Step 4
Wait for strict handshake
The client then reaches the local Unix socket and verifies protocol compatibility and agent readiness.
- Step 5
Handle visible failures
Fix the reported unsupported architecture, missing resource, permission, or readiness problem and rerun the operation without bypassing its gate.
Create a reconnectable terminal
Create a server-hosted tmux window and verify that its task survives a client disconnect.
Steps
- Step 1
Select persistent mode
Open Terminal, select the host, and switch the mode to Persistent terminal.
- Step 2
Create a window
Create a clearly named tmux window or attach to an existing window from the list.
- Step 3
Run an observation task
Enter the harmless continuous-output command and confirm live output and resize behavior.
- Step 4
Disconnect and return
Disconnect or leave the page without choosing Close window, then reopen Terminal and attach to the same window.
- Step 5
Check restored state
Confirm that the previous screen snapshot appears first and new output from the same task continues afterward.
PRODUCT VIEW / REDACTED DEMO
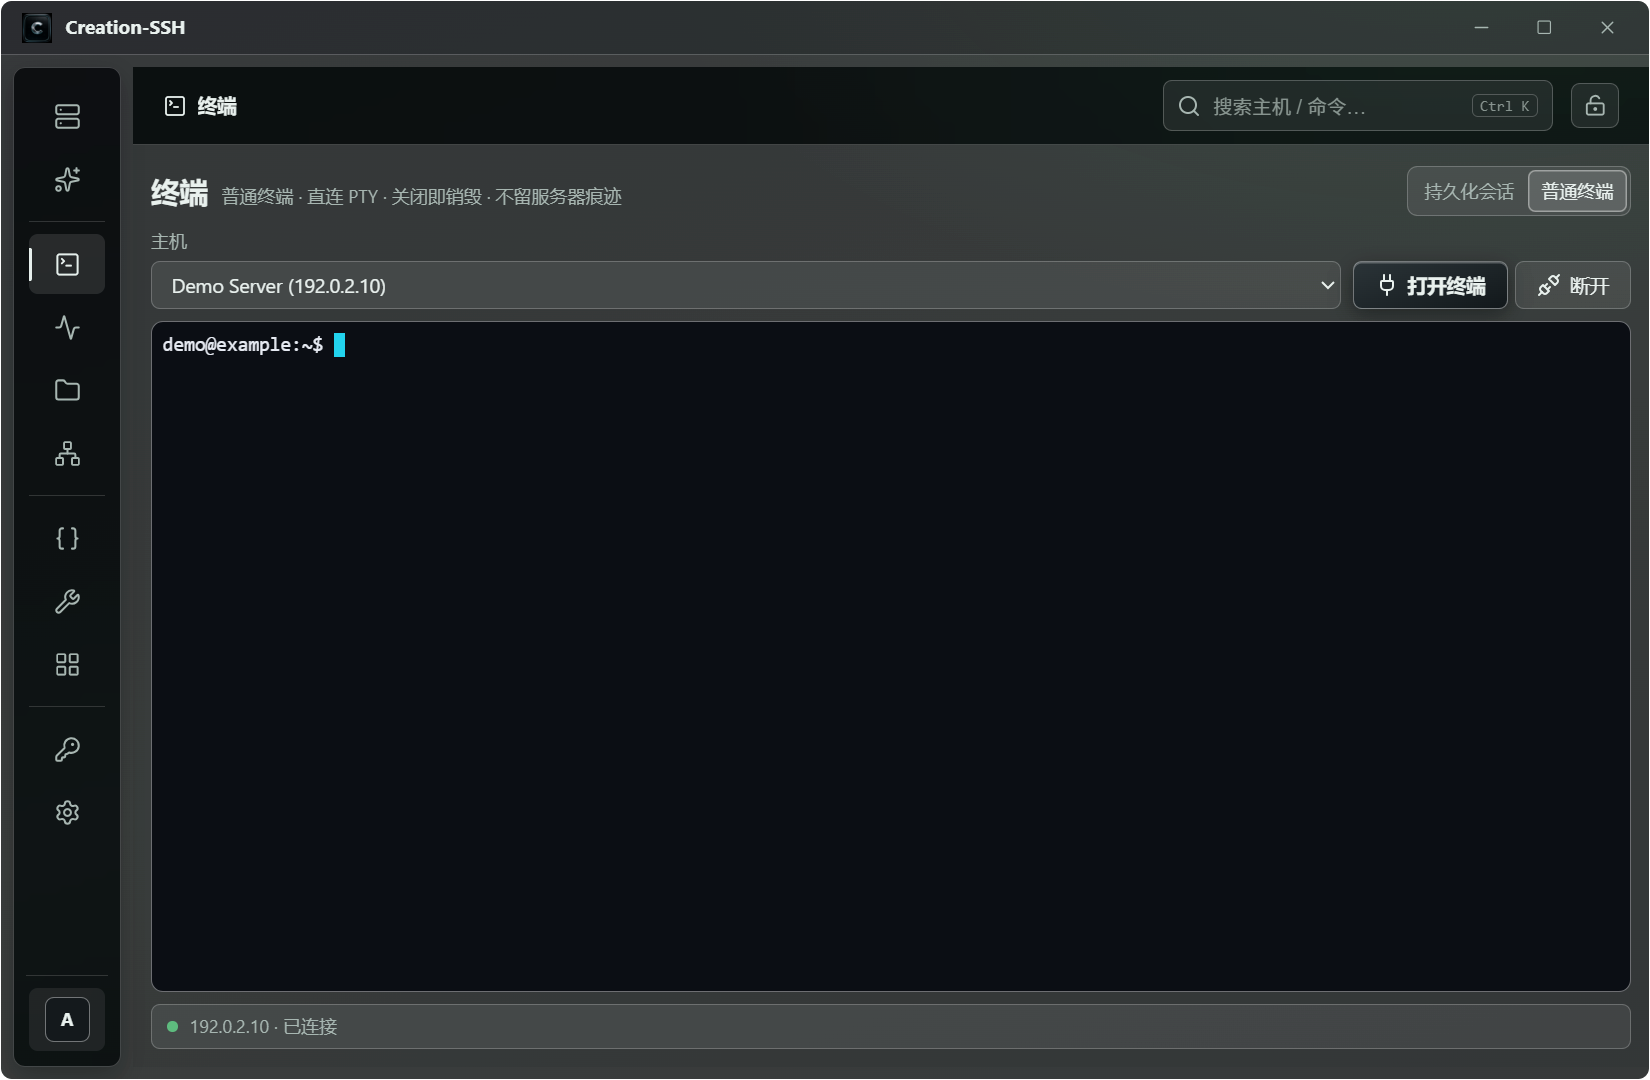
A standard PTY and a persistent terminal are separate paths
The image shows a direct standard PTY. Only persistent-terminal mode uses the client, agent, and tmux to provide a reconnectable session.
Enable monitoring and inspect history
Move from one background snapshot to live detail, then use history and process data to assess the host.
Steps
- Step 1
Enable collection
Enable monitoring for the host and adjust the interval and cross-host concurrency when needed.
- Step 2
Inspect the host overview
Return to Hosts and confirm CPU, memory, disk, load, uptime, and state are read from the latest local cache.
- Step 3
Open monitoring details
Open the host detail and observe the on-demand live subscription. This stream is separate from background short-request concurrency.
- Step 4
Change the history range
Choose a range that already contains samples and inspect the high- or low-resolution history for continuity.
- Step 5
Correlate top processes
Read top processes and system information, then relate resource changes to a process before acting.
Browse and transfer files
Create, edit, upload or download inside a safe remote test directory and use validation to prove transfer integrity.
Steps
- Step 1
Enter a safe directory
Open Files, choose the host, and use the breadcrumb trail to enter a writable temporary test directory.
- Step 2
Create a test file
Create a text file, write recognizable content, save it, and reopen it to confirm the content.
- Step 3
Run one transfer
Upload a non-sensitive file or download the file you just created while watching chunked transfer progress.
- Step 4
Check the commit
Wait for checksum and commit success. For a larger directory, compress it on the server before download.
- Step 5
Clean up your test data
After verifying file identity, remove only the test content created by this tutorial.
Configure and run the AI assistant
Use your own model account to perform one read-only diagnosis against the selected host under controlled permissions.
Steps
- Step 1
Configure the model
Choose the API type and provider in AI settings, enter the API key, and select an available model.
- Step 2
Limit the run
Choose the target host, set permission to read-only, and review the workspace and tool-loop limit.
- Step 3
Ask for a verifiable task
For example, request a summary of system information and resource state while explicitly forbidding file changes or destructive commands.
- Step 4
Observe tool steps
Review every structured read-only tool call and reject any write or execution request that exceeds the selected permission.
- Step 5
Cross-check and retain
Compare the result with Monitoring or System, then confirm the conversation and redacted audit record remain available.
08 / PORT FORWARDING
Use native SSH local forwarding
Port forwarding is an intentional pure-SSH exception and does not depend on the agent.
Bind to loopback by default
Map a server-reachable target to 127.0.0.1 on the client. Change the listen address only when you understand the exposure.
127.0.0.1:<local-port> -> <remote-host>:<remote-port>09 / CLOUD & SECURITY
A Cloud account is optional and SSH remains the data plane
The Creation Cloud production control plane is deployed. A Cloud account is still optional for local SSH workflows.
Manage local hosts without a Cloud account
SSH connections, standard terminals, and local workflows do not require Cloud sign-in. Cloud is limited to control-plane data such as accounts, devices, sync, models, and vault envelopes.
Cloud never proxies the SSH data plane
Private keys, passwords, and plaintext secrets do not go to Cloud. Only client-side encrypted vault envelopes defined by the dedicated plan may be stored.
10 / TROUBLESHOOTING
Stop safely when something is wrong
Protect identity and remote work first, then diagnose network, architecture, resources, and permissions.
The host key changed
Stop connecting and verify the new fingerprint and reason through a trusted channel. Do not delete known_hosts entries to skip confirmation.
Architecture or paired resources are missing
Run real uname -m detection again; the last architecture in SQLite is only a record. Do not upload another architecture or send both sets.
The session did not return
Confirm you used a persistent terminal rather than a standard PTY, then inspect agent and tmux ownership. Do not kill sessions or remove unknown sockets without authorization.
NEXT / KEEP EVIDENCE
Preserve the workspace before reporting a problem
Never silently accept a changed host key, end an unauthorized remote session, or submit real addresses, passwords, private keys, tokens, or complete sensitive logs in feedback.